 Skip to content
Installing a Nest Security Camera is easier than you might think. This guide will walk you through each step clearly and simply.
Security is essential, and having a reliable camera can make a big difference. Nest Security Cameras offer peace of mind with their advanced features. Whether you’re tech-savvy or new to smart devices, installing a Nest camera doesn’t have to be complicated.
In this blog post, we’ll break down the process into easy-to-follow steps. We’ll cover everything from unboxing your camera to setting it up and ensuring it works properly. By the end, you’ll have your Nest Security Camera up and running, keeping your home safe and secure. Ready to get started? Let’s dive in!
Credit: www.security.org
Introduction To Nest Security Camera
Nest Security Camera helps keep your home safe. It is easy to install and use. You can check your home from anywhere. The camera sends alerts if it sees movement. It also records videos for you to watch later. This makes it a good choice for home security.
Benefits Of Nest Security Camera
One big benefit is the camera’s clear video. The camera works day and night. It has night vision, so you can see in the dark. Another benefit is the camera’s smart alerts. It can tell the difference between people and things. This means fewer false alarms.
Key Features
| Feature | Description |
|---|---|
| Video Quality | High-definition for clear images |
| Night Vision | See in the dark |
| Smart Alerts | Notifies you of important events |
| Easy Installation | Quick and simple setup |
| Remote Access | View from any location |
Choosing The Right Nest Camera
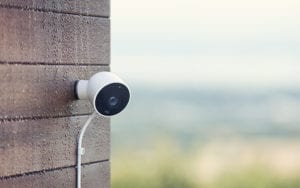
Indoor cameras are best for watching inside your home. They help you see your living room, kitchen, or bedrooms. Outdoor cameras are made to handle rain, snow, and heat. They protect your yard, driveway, and front door. Choose the right camera based on where you need it. Indoor cameras are not strong enough for outside. Outdoor cameras can be too much for inside use.
Resolution is how clear the picture is. Higher resolution means a better picture. 1080p is a good choice for most homes. 4K is even better but costs more. Field of view is also important. It means how much area the camera can see. A wider field of view lets you see more. Night vision helps you see in the dark. Two-way audio lets you talk through the camera. Motion detection alerts you when something moves. Check all these specs before you buy.
Preparing For Installation
Gather all necessary tools and materials before starting. Ensure the camera and mounting spot are ready for a smooth installation process. Check the Wi-Fi signal strength at the installation location.
Required Tools And Materials
You need a drill, screwdriver, and ladder. Also, have the camera, mounting plate, and screws ready. Make sure you have a stable internet connection. Keep the Nest app installed on your phone. A level helps with straight placement. You might need anchors for drywall installation. Ensure all tools are within reach before starting. This makes the process smoother.
Selecting The Installation Location
Choose a place with a clear view. Avoid areas with direct sunlight. Make sure the camera is within Wi-Fi range. Check for a nearby power outlet. The camera should be high enough to avoid tampering. Ensure it covers entry points like doors and windows. Test the view before final installation. This ensures optimal coverage.
Setting Up The Camera
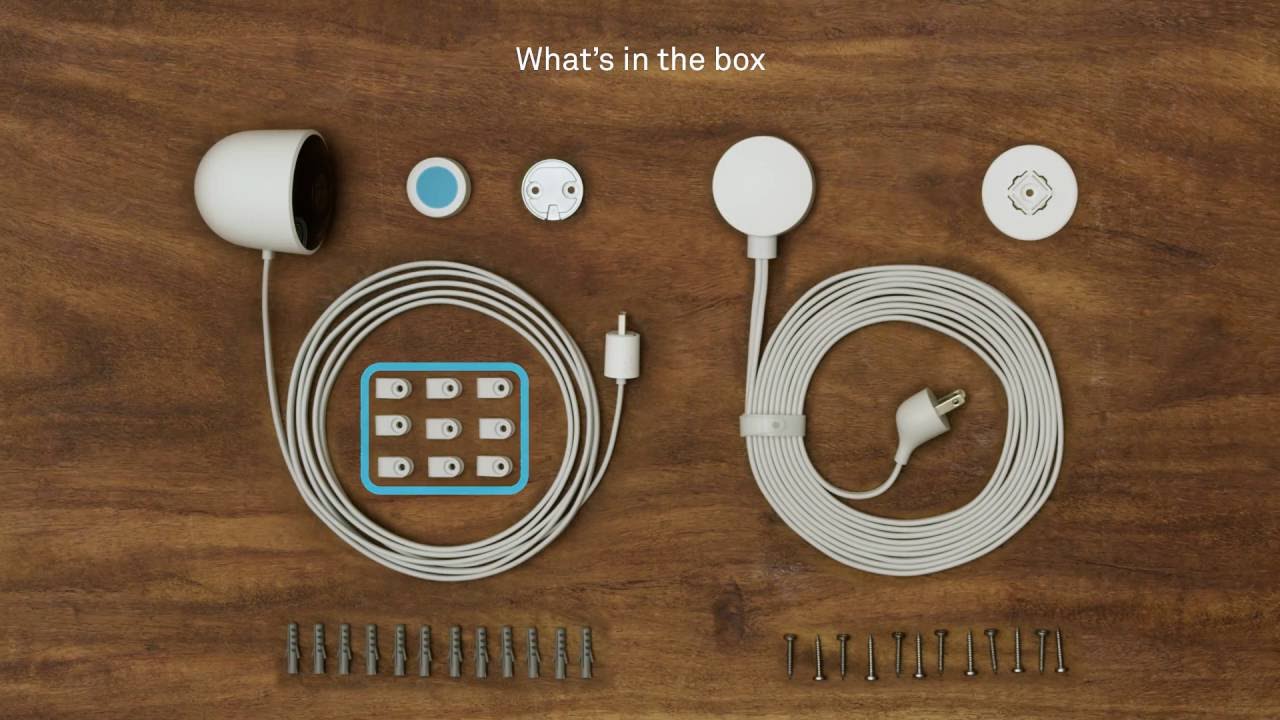
Open the box carefully. Check all items are present. You should see the camera, a power adapter, and mounting tools. Inspect the camera for any damage. Make sure all parts are there. Read the quick start guide. This guide helps you understand the setup process.
First, find a power outlet. Plug the power adapter into the outlet. Connect the other end to the camera. You should see a light on the camera. This means it’s getting power. Wait for the camera to start up. This may take a few moments. Check the light color to know it is ready.
Connecting To Wi-fi
Connect your Nest Security Camera to Wi-Fi for smooth operation. Open the app and follow the prompts to join your network. Ensure a strong signal for the best performance.
Wi-fi Requirements
Your Nest camera needs a strong Wi-Fi signal. Ensure your Wi-Fi router is close. The camera works best with 2.4 GHz Wi-Fi. It can also connect to 5 GHz. Make sure your Wi-Fi password is correct. The network should not have any special characters.
Steps To Connect
Plug in your Nest camera. Download the Nest app on your phone. Open the app and create an account. Tap on “Add Product” in the app. Scan the QR code on your camera. Follow the on-screen steps. Enter your Wi-Fi password when asked. Wait for the camera to connect. The app will notify you once connected.
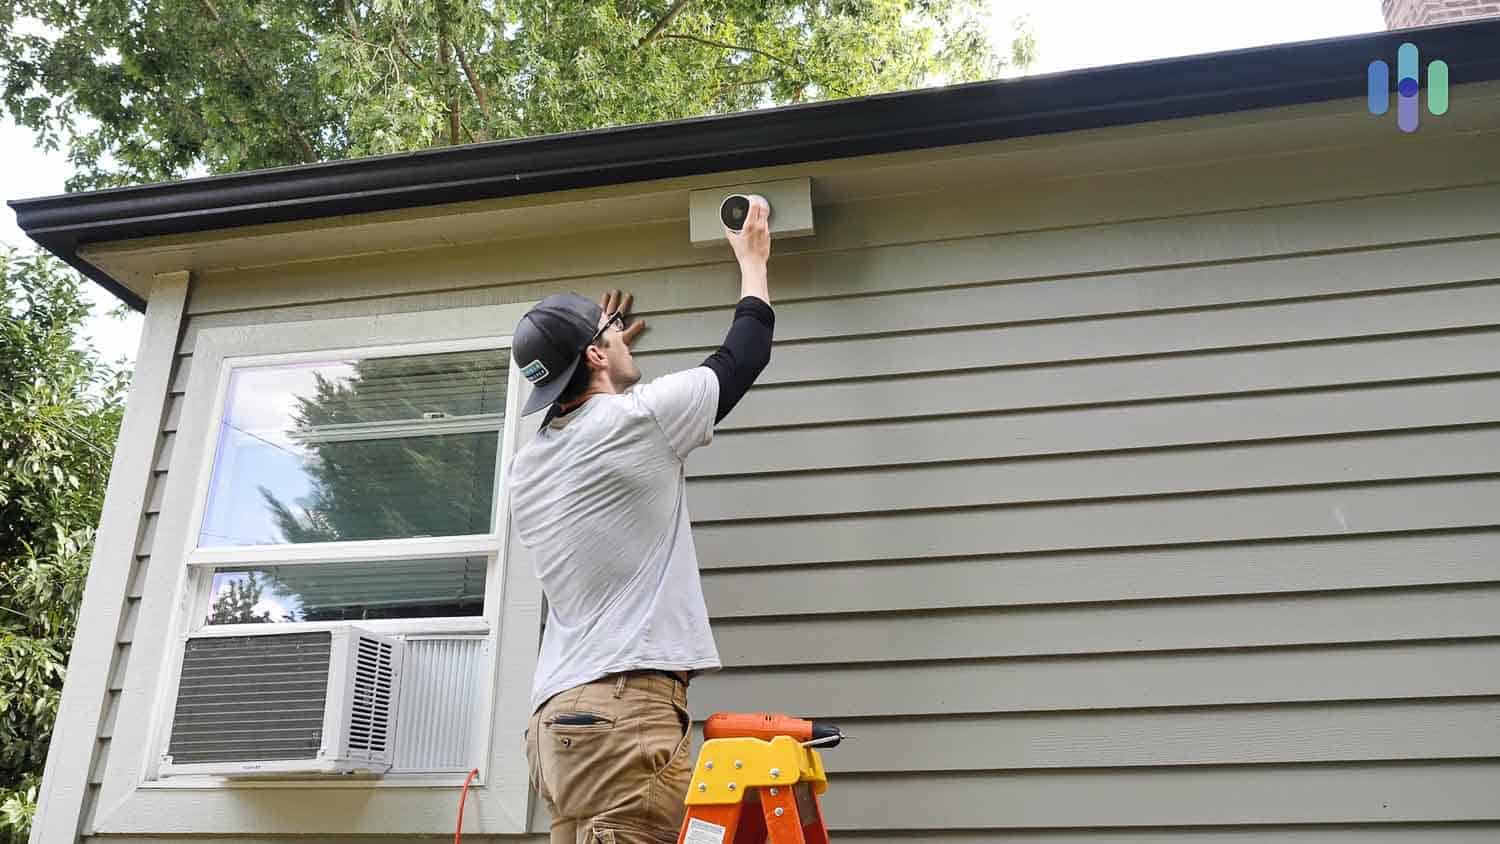
Mounting The Camera
There are two main options. You can use screws or adhesive tape. Screws offer a secure hold. Adhesive tape is quick and easy. Choose what works best for your needs.
First, pick a good spot for the camera. Make sure it covers the area you want to watch. Next, mark where the screws will go. Drill the holes if using screws. Attach the mounting plate. If using tape, peel off the backing. Press the plate firmly against the wall. Finally, attach the camera to the plate. Adjust the angle for the best view.
Configuring Camera Settings
Open the Nest app. Tap on your camera. Go to settings. Choose video quality. Higher quality uses more data. Lower quality saves data. Consider your internet speed. Choose the best setting. Test the video. Make sure it is clear. Adjust if needed.
Open the Nest app. Tap on your camera. Go to settings. Find notifications. Turn them on. Choose what alerts you want. Motion alerts are helpful. Sound alerts can be useful. Customize the settings. Test the notifications. Make sure they work. Adjust if needed.
Credit: www.safewise.com
Integrating With Other Devices
Nest Security Camera works well with other smart devices. Connect it with your smart lights and smart locks. The camera can send alerts to your phone. It makes your home safer.
For best results, use a stable Wi-Fi connection. Place the camera close to your router. This helps to avoid signal problems.
Control your Nest Camera with voice commands. Say “Hey Google, show me the front door.” The live feed will appear on your screen. This works well with smart displays and phones.
Make sure your devices are on the same Wi-Fi network. It ensures smooth operation. Keep your app updated for the best experience.
Troubleshooting Common Issues
Installing a Nest Security Camera can sometimes be tricky. Ensure the camera is correctly connected to Wi-Fi and power. If issues persist, try resetting the device and updating the app.
Connection Problems
Connection problems can be frustrating. Check your Wi-Fi first. Ensure it’s working well. Restart your router. This often helps. Move your Nest camera closer to the router. Sometimes, distance causes issues. Use a Wi-Fi extender if needed. Make sure your camera’s firmware is up to date. Updates fix many bugs. Check your app for updates too. Turn off other devices if the network is crowded. This frees up bandwidth. If all else fails, restart the camera. Hold the reset button for 10 seconds.
Camera Performance Issues
Poor camera performance can ruin your experience. Clean the camera lens often. Dust affects image quality. Adjust the camera angle. Ensure it covers the needed area. Check the power source. A weak source can cause problems. Use the original power cable. Third-party cables may not work well. Update the camera software. New updates fix bugs. Reduce other network traffic. Too many devices slow things down. If the camera still lags, restart it. Hold the reset button for 10 seconds.
Credit: www.youtube.com
Frequently Asked Questions
How Do I Set Up A Nest Camera?
To set up a Nest camera, download the Nest app. Follow the in-app instructions to connect your camera to Wi-Fi and complete the setup process.
Where Should I Install My Nest Camera?
Install your Nest camera in a location with a clear view of the area you want to monitor. Ensure it is within Wi-Fi range and protected from extreme weather conditions.
How Do I Connect Nest Camera To Wi-fi?
Open the Nest app and follow the prompts to connect your camera to your Wi-Fi network. Ensure your Wi-Fi signal is strong where you plan to install the camera.
Can I Install A Nest Camera Myself?
Yes, you can install a Nest camera yourself. Follow the detailed instructions provided in the Nest app. The process is designed to be user-friendly.
Conclusion
Installing your Nest Security Camera is straightforward and quick. Follow the steps carefully. Mount your camera, connect it to Wi-Fi, and adjust settings in the app. Test the camera to ensure it works properly. Now, your home is better protected.
Regularly check for updates to keep your system secure. Enjoy the peace of mind that comes with enhanced home security. If you face issues, consult the user manual or contact support. Stay safe and secure with your new Nest Security Camera.
