
Hamilton Beach is a very popular kitchen appliances manufacturer in today’s market. The company’s products excel in quality, effectiveness, price, and durability worldwide.
Today we want to focus on their blender. Do you want to know how to assemble Hamilton Beach Blender? Many users of Hamilton Beach blender ask this question a lot. It is especially rampant among new users.
Whether it is how to assemble or disassemble the blender that you have not understood yet, this guide provides you with the most accurate answers to these queries and more.
Once you have learned the process of assembling and disassembling this electric appliance, you will have an easier time using and cleaning it. With the right knowledge, you will be able to use and clean your Hamilton Beach Blender easily, quickly, and perfectly.
This guide is designed to provide all the necessary information to support you as a Hamilton Beach Blender user for successful everyday handling and usage.
How to assemble Hamilton Beach Blender?

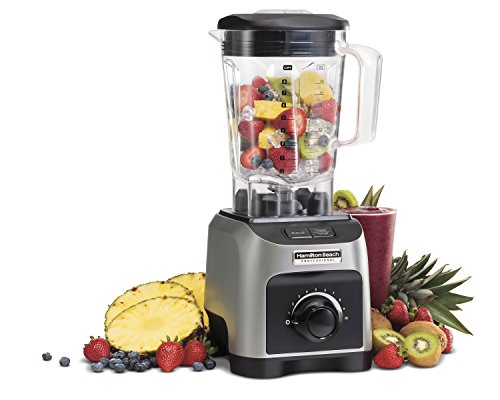
- POWERFUL BLENDING PERFORMANCE: With 700 watts of peak...
- ULTRA-SMOOTH RESULTS WITH PATENTED WAVE~ACTION(R) SYSTEM: As...
- SERVE WITH EASE: The spout on this countertop blender lets...
- EASY TO CLEAN WITH DISHWASHER SAFE GLASS JAR, LID AND...

- THE ORIGINAL BLEND AND GO PERSONAL BLENDER: Bring home the...
- POWERFUL BLENDING PERFORMANCE: Durable stainless steel...
- EASY ONE-TOUCH BLENDING: Quickly prepare a variety of icy...
- COMPACT DESIGN FITS MOST CUP HOLDERS: The small size of the...
The first thing anyone should learn in a blender when it has just been bought is how to assemble and disassemble it. You will be more comfortable and in a better position to enjoy its usage fully if you master this simple art.
Once you have mastered the Hamilton Beach Blender assembly process, it can take you just a few minutes to put it together. If you have not mastered the processes yet, follow the blender users manual keenly to find your way through it.
This section presents all the steps that you need to follow on how to assemble a blender.
Step One
For the sake of your safety, make sure your Hamilton Beach blender is completely unplugged from the power outlet before you begin the assembling process. This is a basic safety precaution that should be taken in most processes that involve an electric appliance.
Step Two
Place the base of the blender on a clean dry surface in the open. A countertop or kitchen table can be great. Just make sure the top is clean and dry.
Step Three
Place the cutting hamilton beach blender replacement blades in the safety base of your Hamilton Beach Blender.
Step Four
Make sure the gasket fits well over the blades of your blender. The gasket should be flexible and flat.
Step Five
Set the blender jar over the gasket then screw it on the safety base. At this point, you should ensure that the blender’s safety base is firmly screwed onto the blender jar.
Step Six
Place the blender jar on the base of the Hamilton Beach Blender and set it firmly with that base. The jar should be well fitted on the base and it should sit properly on it. Then you should make sure that it is securely set.
Step Seven
Now you can plug the power cord into the outlet. Make sure the power outlet is switched off when plugging in the cord.
Step Eight
If you intend to blend immediately, place your food ingredients into the jar before you cover it. Also as part of the assembly process, set the lid on the jar.
Step Nine
Now place the filler cap on the lid.
Step Ten
Now before you begin to blend, check once more to make sure that every part is assembled properly. The parts that are joined must be securely, and firmly in place before the blending begins.
How Do You Take Apart A Hamilton Beach Blender?
- Powerful performance with 1800 watt/2. 4 peak HP....
- Speed dial for ultimate control. Variable speed dial...
- Durable and quiet. Built to last, the blender motor is...
- Dishwasher-safe, Tritan, 64 oz. Jar. Jar is BPA-free and...
Taking apart the blender is just as easy as putting it together. It simply involves undoing what you did during the assembly, in the reverse order.
However, you should not guess your way through the process. Instead, there are documented steps that should be followed for the process to be a complete success.
This section presents to you all the steps to follow to take your blender apart until all the pieces making it up are separated. Here are the ten steps.
Step 1
If the blender is connected to an electric source, disconnect it first before you begin to disassemble it. Or simply, make sure that it is not plugged into the electrical outlet as a safety precaution.
Step 2
You can use the quick clean method to clean the blender before you disassemble it. This may be necessary only if the interior is dirty.
Step 3
Prepare a safe clean place to put the disassembled parts. The area should be dry and spacious too.
Step 4
Remove the filler cap from the blender’s jar lid. Put it somewhere clean and safe to avoid possible breakage.
Step 5
Take apart the blender lid from the jar. Put it in the disassembled parts in an organized fashion.
Step 6
If you can remember how you assembled the blender jar to the base, apply the exact opposite of that process to take apart these two parts. You separate the jar from the base by unscrewing the former from the latter.
You should do it carefully and slowly and when it is done the parts be placed in the same safe place you had set apart.
Step 7
At this stage, remove the gasket from the blender blades.
Step 8
Take the blades off the blender’s safety base and place them on the surface.
Step 9
By now, every separable part of the Hamilton Beach Blender should be separate. Check to make sure that everything is taken apart.
Step 10
Clean any part that could not be accessed before the disassembling. For instance, wipe the blender base with a damp kitchen cloth and let the parts dry.
How To Use Hamilton Beach Blender?

- BUILT TO LAST: This Hamilton Beach blender is built for...
- 14 FUNCTIONS FOR MAXIMUM BLENDING VERSATILITY: Easily blend...
- ULTRA-SMOOTH RESULTS WITH PATENTED WAVE~ACTION(R) SYSTEM: As...
- ICE-CRUSHING POWER: With stainless steel Ice Sabre blades...
Hamilton blender is ideal for smoothies. If you want to get the best performance from the blender, know the following:
Safety first
You begin by ensuring that the blender is unplugged to avoid electric shock. Then you inspect the blender parts for any signs of wear or breakages.
Such inspections are necessary because parts such as cutting blade assembly and the blender jar are subject to wear or breakage during normal use.
The blender jar may have nicks, chips, or cracks while the cutting blade assembly may have broken, cracked, or loose blades. If you notice any of these signs, do not use the blender.
Preparation
Before you even add the ingredients, prepare the blender as follows. In an unplugged position, place the base of the blender on a clean, dry surface.
With the blade side up, place the cutting blade assembly through the opening in the blender jar then twist the collar onto the jar’s bottom.
Add ingredients
Larger ingredients can be cut into smaller pieces first before they are added to the blender jar. Once you have put all the ingredients in the jar, place the lid on the jar. Then place the blender jar on the base.
Plugin and blend
Now is the right time to plug your blender into the power source or outlet. Press the power button, which will turn white to indicate that it is on and ready to blend.
Choose the desired program or speed by pressing the respective buttons to increase or reduce. To stop blending, you simply press the power button. Once the blender is off, make sure you unplug it from the power outlet immediately.
How Do You Clean A Hamilton Blender?
Make sure the blender is unplugged before you begin the cleaning process. Also, before you clean your blender, you need to take it apart until every attachable part is on its own.
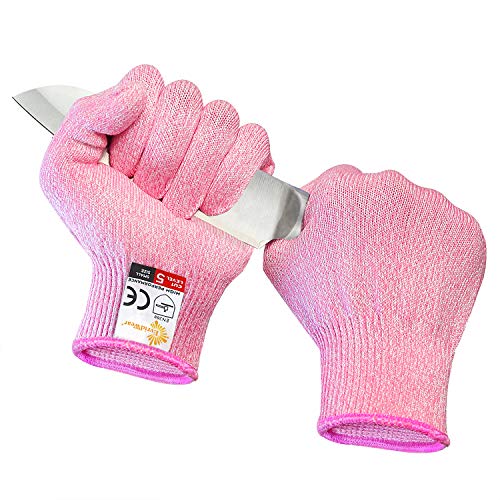
The Hamilton Beach Blender manuals show the most appropriate way to disassemble the appliance. Cleaning the cutting blades is very easy but it can be hazardous because the blades are very sharp.
Therefore, wear protective gloves and keep a safe distance and avoid contact with blades. Use warm soapy water to clean the blades then rinse them under running fresh water.
When the blades are already thoroughly cleaned, let them dry. Since the blades are dishwasher safe, you can clean them in a dishwasher if you want to.
Clean the lid and filler cup by brushing them using a toothbrush in hot soapy water.
The brushing should be gentle but thorough. Rub these parts then rinse them with fresh water. Let it dry by air. Then clean the blender gasket by washing it thoroughly by hand and in warm soapy water.
Once it is thoroughly cleaned, rinse it in fresh water and let it dry.
Clean the Hamilton Beach Blender jar in hot soapy water, but carefully yet thoroughly.
When you are done, rinse with fresh water then dry it either by air or a dry towel. Use the same process to clean the safety batch. The control panel, blender base, and cord are better wiped clean with a damp cloth or towel.
You May Like
- How To Clean Hamilton Beach Blender
- Hamilton Beach Wave-Action Blender Review
- Hamilton Beach Personal Creations Blender Review
Recommended Equipment For Cleaning A Hamilton Beach Blender


Why Is My Hamilton Beach Blender Not Working?

- Blender model #: 54221 with patented Wave-Action system and...
- 10 cup food processor with built-in bowl scraper attachment...
- Blender has 14 functions including mix, puree, dice, crush...
- Food processor has 2 speeds, pulse function and 450 watts...
Various reasons can explain why your blender is not working. For instance, when the blender is not properly plugged in, it will not turn on. If that is the reason, you can solve the problem by properly plugging it in.
Also, failure to select a power setting or selecting the wrong power setting can be the reason the blender is not turning on. When your Hamilton Beach Blender starts but shuts down mid-process, overheating may be the cause.
When the machine is excessively overheating, the thermal fuse will automatically activate. It will not work afterward at least until it cools down. A misplaced blender jar will also prevent it from turning on.
The jar must be positioned at the base correctly. All the safety components must be in the proper place for the blender to turn on. Another reason for the blender failing to work may be an excessively filled pitcher.
The worst possible cause of the blender’s failure to work is when it suffers a motor failure. If that is the case you will have to replace the motor. Some people prefer to just buy another blender instead.
Frequently Asked Questions
Q: Can You Put Hot Food In Hamilton Beach Blender?
A: No, it is never a good idea. It can be disastrous to do it. Blending hot food will develop pressure which then builds inside the jar and the jar and its content may explode as a result. Avoid it at all costs for the sake of everyone’s safety.
Q: How Do You Put The Blade Back on A Hamilton Beach Blender?
A: Begin by placing the blades in the blender’s safety base. Then fit the gasket well over the blades. Now you can set the jar on top of the gasket and screw it firmly on the safety base.
Q: How Do You Turn on A Hamilton Beach Blender?
A: Assuming that it is perfectly assembled the ingredients are in the jar with the hamilton beach blender replacement lid tightly fitted, plug it into the electricity source.
After turning the power on at the socket, press the power button on the blender. If the button turns white, it means the blender is on.
Q: Can You Blend Ice In Hamilton Beach Blender?
A: Yes. There is a button for the ice crush program that breaks the ice into smaller pieces. It can blend ice into pieces small enough for fine cocktails and slushies. Just make sure you add cool water to the jar with the ice before blending.
Q: How Do I Put My Blender Back Together?
A: As mentioned in the section ‘How to assemble Hamilton Beach Blender?’ above, you start to attach the parts from the base to the lid. You can DIY by following the ten steps provided in that section or you can get someone who knows how to do it to help you.
Final Verdict of How To Assemble Hamilton Beach Blender?
Have you found the answers to the question of how to assemble Hamilton Beach Blender? By now you should have learned more than enough from this guide.
Everything you need to know to use your new blender successfully is covered in this guide. It contains relevant and accurate information about this blender, from how to assemble to how to disassemble it.
You can also learn how to use and clean it properly. We have also highlighted the possible reasons why a blender fails to turn on. Use this guide wisely and you will enjoy using your blender.